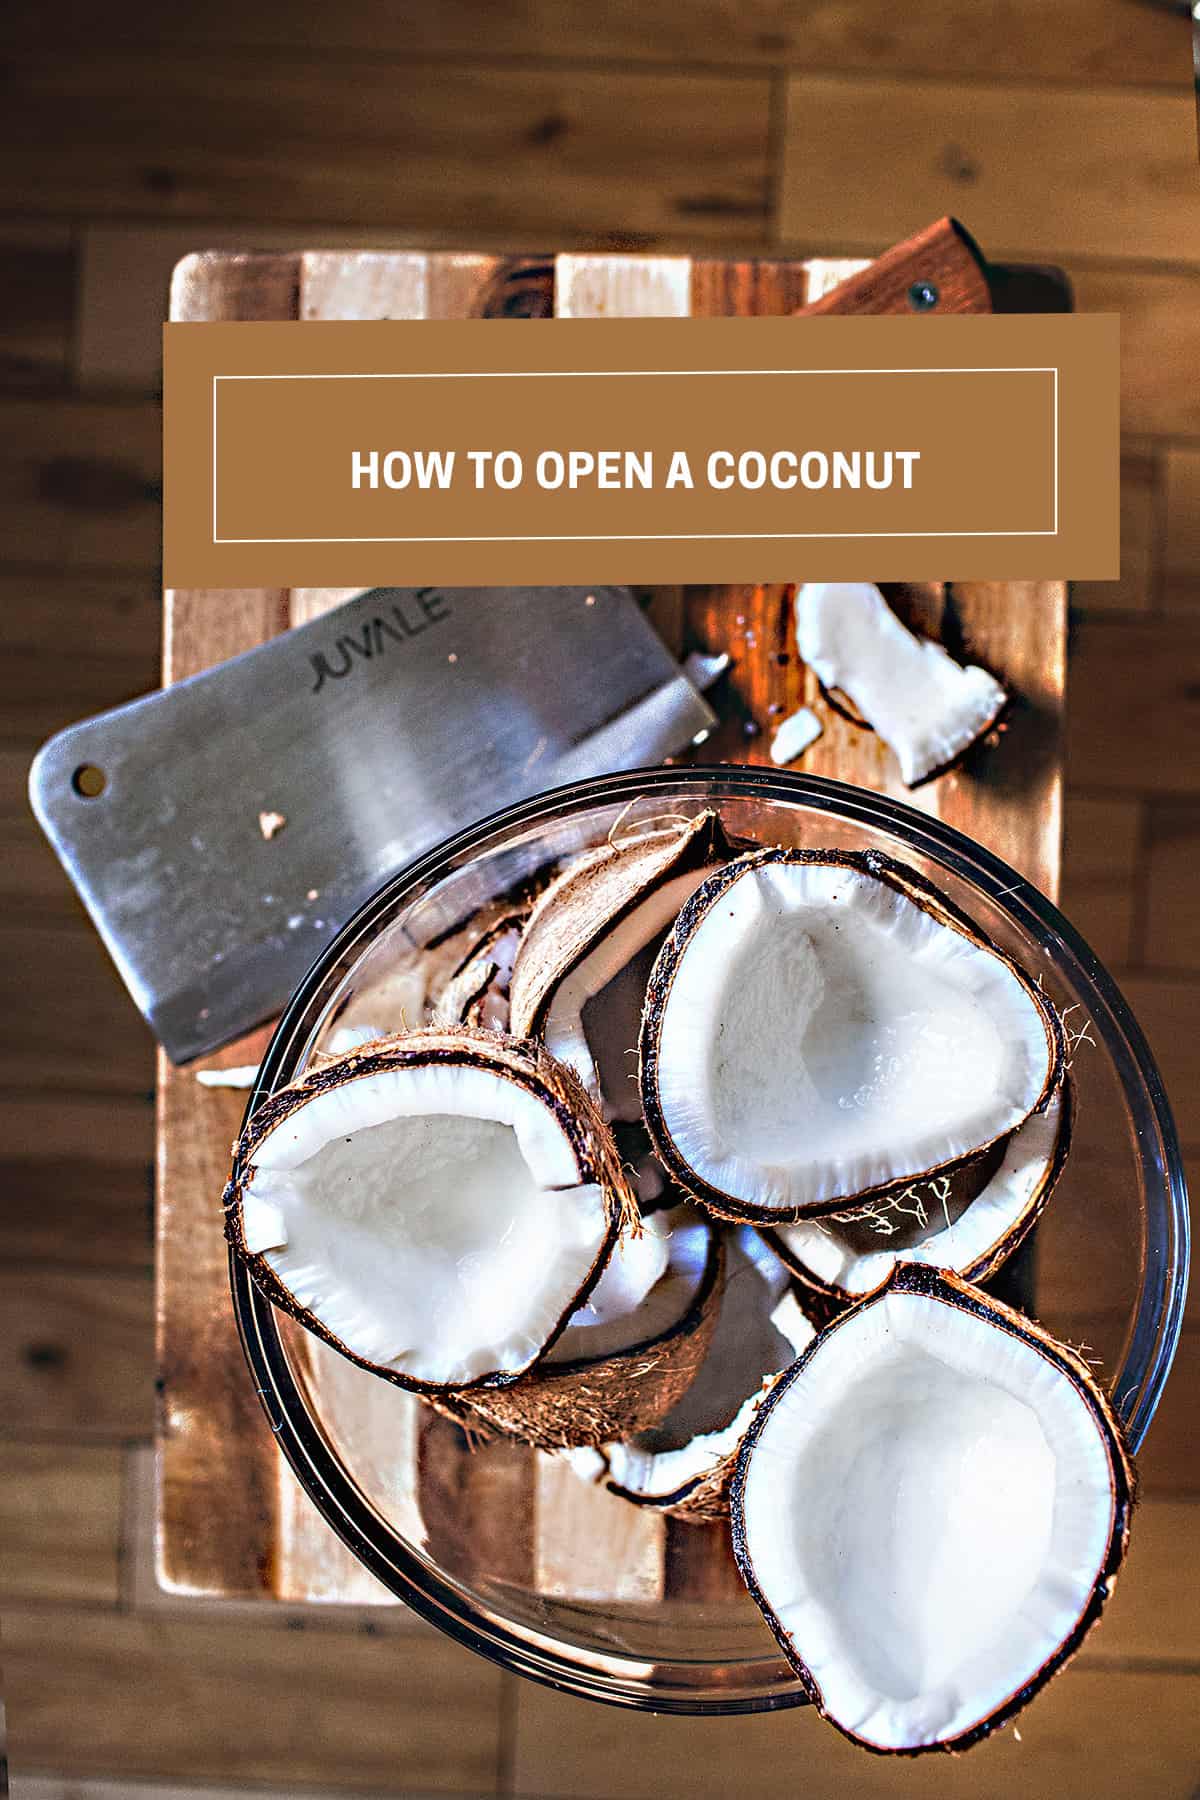
Learn how to open a coconut in 4 easy ways! whether young or mature, without any special tools. Use your everyday items found in your kitchen, and you'll be on your way to enjoying the fragrant water and tasty coconut meat!
Learn how to make fresh coconut milk here!
Check out these Thai recipes using coconut. Thai cod curry, Penang curry, Massaman beef, Yellow curry with pork belly, Vegetarian red curry with vermicelli noodles, Authentic Thai red curry with chicken, and Khao Soi noodles.
Jump to:
- Coconuts in Thai Cooking
- How to Choose a Coconut
- What Does Coconut Water Taste Like?
- Where to Buy Coconuts
- Tools for Opening Coconuts
- Tools I Don't Recommend for Cracking a Coconut
- The Eyes of the Coconut
- 1. A Cleaver Method
- 2. Hammer Method
- 3. Oven-Baked Method
- 4. Whacking Method
- Draining the Coconut
- What to Do with Coconut Meat
- What to do with Coconut Water
- How to Open a Young Coconut
- What to Do with Young Coconut Meat
- Thai Recipes Using Coconut
- Important Tips for Opening a Coconut
- How to Open a Coconut
- More Thai Recipes Using Coconut
- More Thai Kitchen How-To's
Coconuts in Thai Cooking
Coconuts and Thai food are a perfect match! Not only Thai cuisine but also dishes from all over the world embrace the goodness of coconuts, from mouthwatering Thai curries to delightful European coconut macaroons, cakes, and cookies.
Thailand, especially the southern regions, is blessed with abundant coconuts. Thanks to the ideal climate and soil-rich minerals, coconut trees flourish there. Let's discover the basics of cracking open this essential ingredient in Thai cooking.
How to Choose a Coconut
Learn how to choose a perfect coconut, young or mature coconuts, with these helpful tips below.
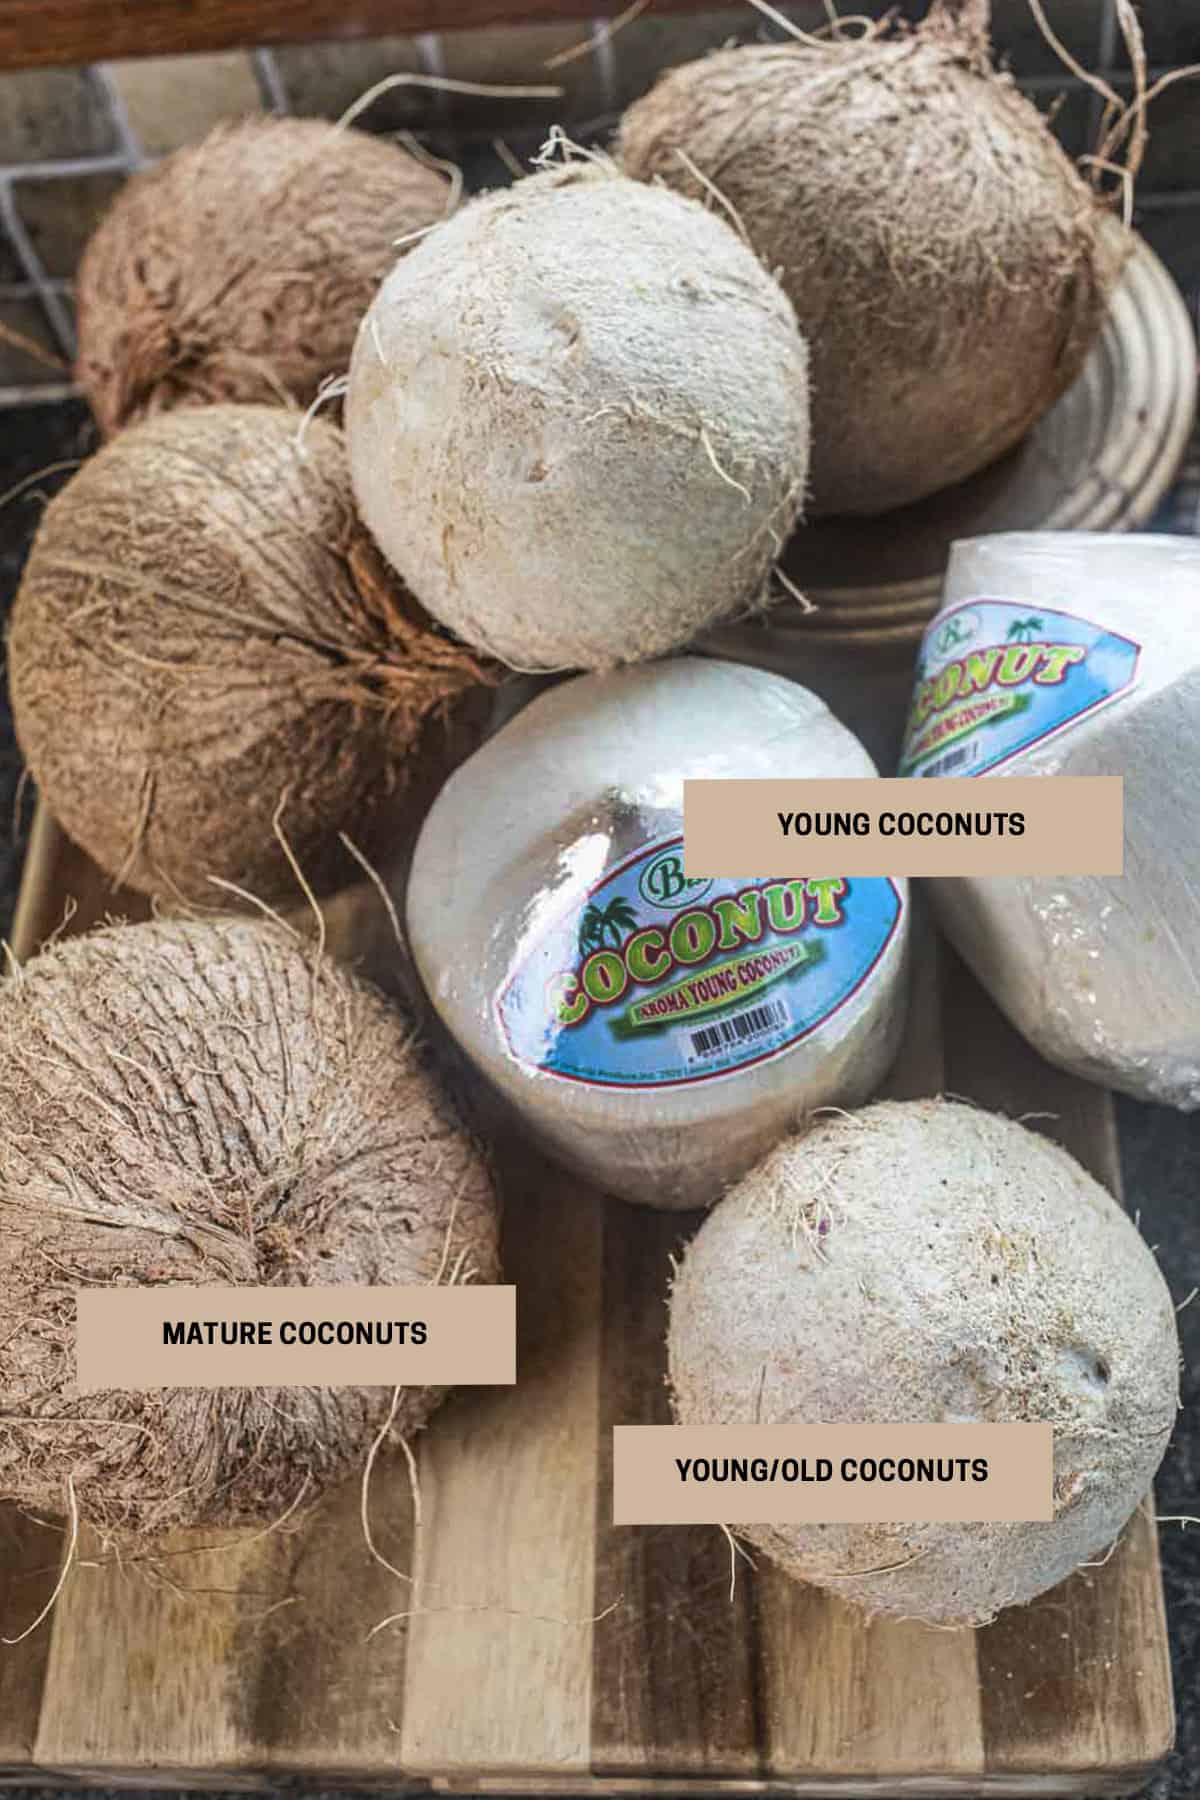
How to Choose an older coconut
Mature coconuts are ripe coconuts that are in their prime for use for cooking. They have tough brown skin or shells protecting the delicious white coconut meat. These coconuts are especially great for making fresh coconut milk.
When choosing a mature coconut, choose one with no cracks or mold spots. Give it a good shake and listen for a good swishing sound.
A good coconut will feel heavy and have lots of water inside. Listen for the swishing sound. I typically feel out a few of them and choose the ones that seem to be the heaviest ones with the most swishing sound of the coconut water inside. Skip the ones that feel extra light and have minimal liquid sounds inside compared to those from the same pile.
Brown coconuts can be kept at room temperature.
How to Choose a Young Coconut
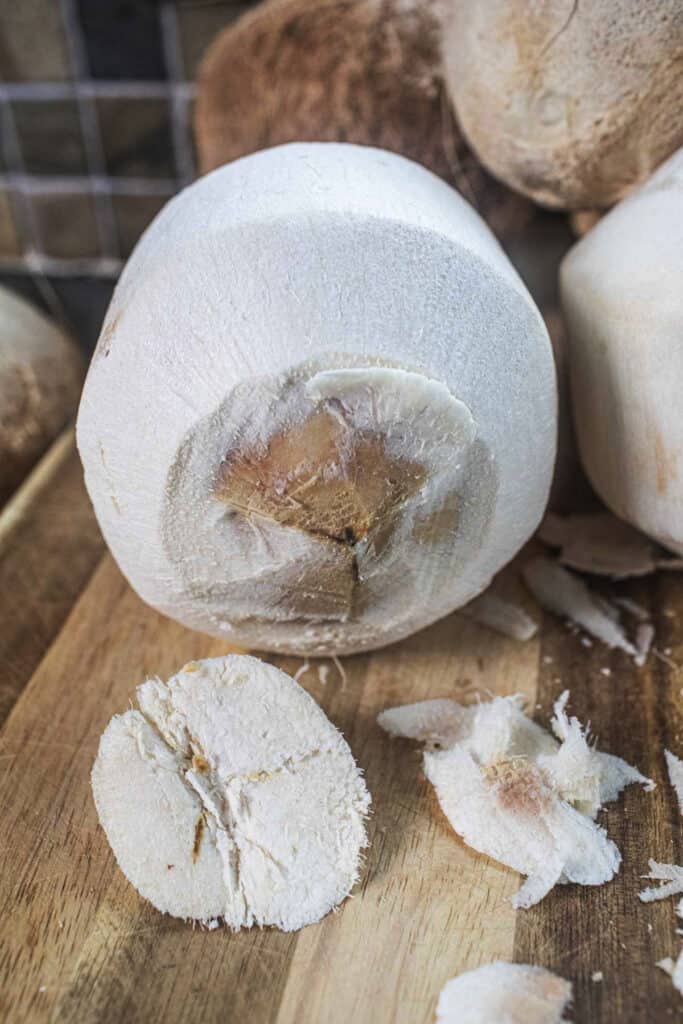
Young coconuts are different than mature coconuts. They look and taste different, too. The coconut shell is white and not brown.
Young coconuts sold in Asian markets in the US are typically in the refrigerator to keep them fresh longer, as they tend to go bad quicker than brown coconuts.
The skin and water inside these young coconuts are prime for drinking and eating fresh.
When choosing young coconuts, the same rules apply as the older ones. Look for ones without mold or brown spots. Feel out the ones with the most swishing sound of liquid inside and grab the heavier ones from the bunch.
These are best kept in the refrigerator at home to keep them fresh and last longer.
The young green coconuts have not been shelled yet, and they are still fresh and have very delicious coconut meat!
Somewhere in the Middle
Sometimes, mature coconuts have white shells, and they can be confusing. See the image above.
This typically means two things. White usually means that they have been freshly husked. The fibers around the shell haven't had enough time to turn brown yet. So they are fresh!
Or two, the white shells could also indicate that the coconuts are between ripe and young, leaning more towards the ripe side.
When you come across coconuts like these, treat them more like mature rather than young coconuts. Read on below on how to crack young and old coconuts.
What Does Coconut Water Taste Like?
The coconut water is fragrant, sweet, and excellent for hydration, especially on hot days! You typically see these with straws or festive umbrellas inside, and the shells are used for cocktails or delicious fun drinks.
Where to Buy Coconuts
Coconuts are available in many places. I was able to find them at my regular grocery store easily. Check your local grocery stores, Asian markets, Natural Grocers, Trader Joe's, and Whole Foods.
Tools for Opening Coconuts
Opening a coconut can be done in many ways, requiring different tools. These tools are essential for cracking coconuts using my simple methods. Choose the safest and most comfortable method, and you'll be cracking coconuts like a pro in no time!
- A dish towel. Hold the coconut in place and crack the coconut open using the whacking method.
- Solid cutting board. Use a solid cutting board to protect your counter.
- Cleaver or a heavy kitchen knife. Grab a heavy kitchen knife or cleaver to cut through the tough coconut shell.
- Hammer or mallet. Grab a hammer or mallet to whack the coconut open.
- A thin and long object. A strong chopstick, a metal straw, or a long, thin, straight object to poke the eyes of the coconut.
- Screwdriver or metal skewer. Use a screwdriver or metal skewer to poke holes in the eyes of the coconut.
- Butter knife. A butter knife will be handy for prying the coconut meat open after it's cracked open.
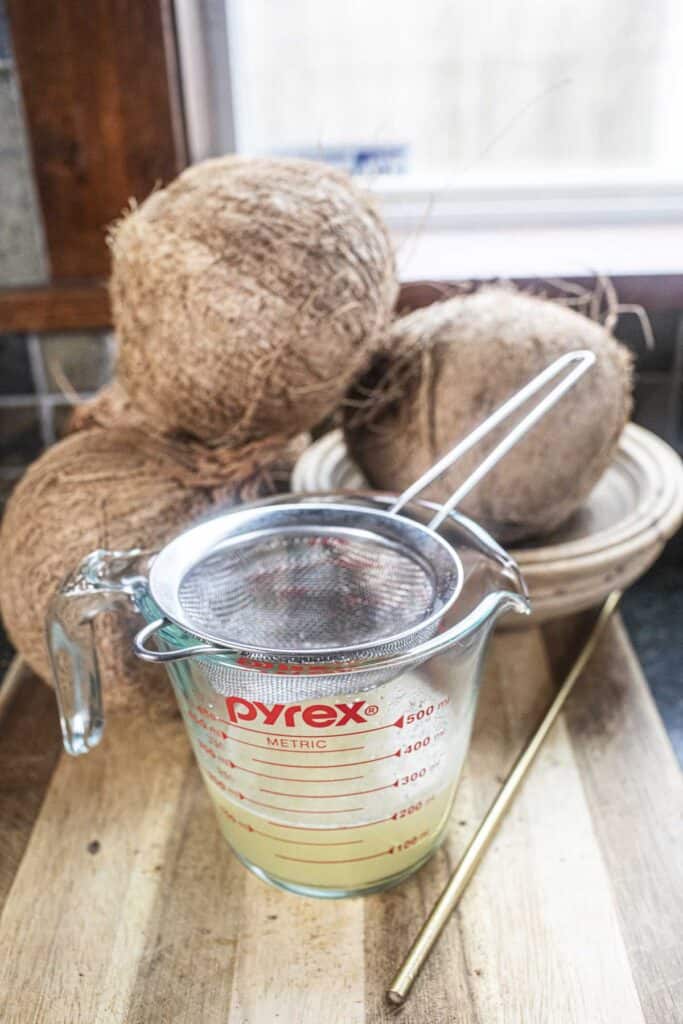
- Liquid measuring cup. Don't forget a liquid measuring cup to catch the coconut water.
- A small wire mesh strainer. Use to filter out the coconut water from the small brown bits from the cracked shells.
Tools I Don't Recommend for Cracking a Coconut
I don't recommend using these tools to open your coconut. Trust me, I've tried many methods, and these tools are just a hassle and frustrating.
- Paring knives. These are more dangerous for me than using a big cleaver. The coconut meat is usually stuck tightly to the shells, and peeling it off takes some force. Using a small and sharp paring knife can lead to slips and accidents.
- Vegetable peeler. This might work for young coconut meat, but the round shape of the coconut makes it annoying to peel around the shells with a vegetable peeler.
- Power tools. Cracking open a coconut shouldn't require a power drill or tools. It's too dangerous. And not that serious! (: The easiest and best way is to use the whacking method (see below) before resorting to power tools.
- A saw. Using a saw to crack a mature coconut will take forever, creating a huge mess with fibers and tiny bits of shells flying everywhere in your kitchen. I've tried it, and it's just frustrating.
The Eyes of the Coconut
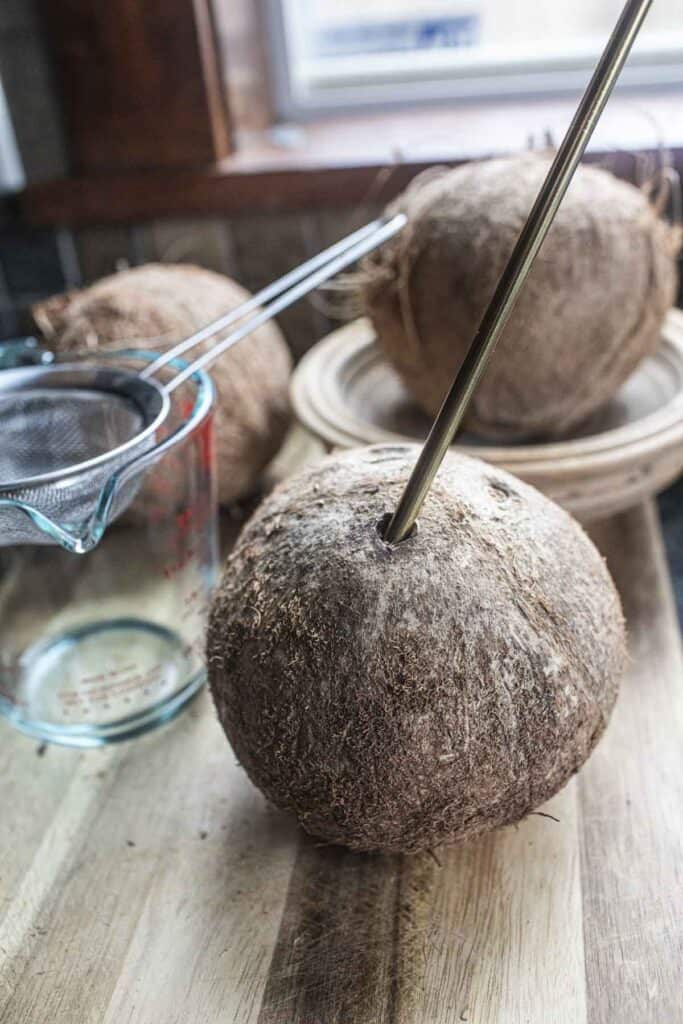
Before cracking a coconut, there are a few important things to know. First, you'll notice three eyes or dark brown spots on top of the coconut. These are the weak points where you can make small holes and drain the water.
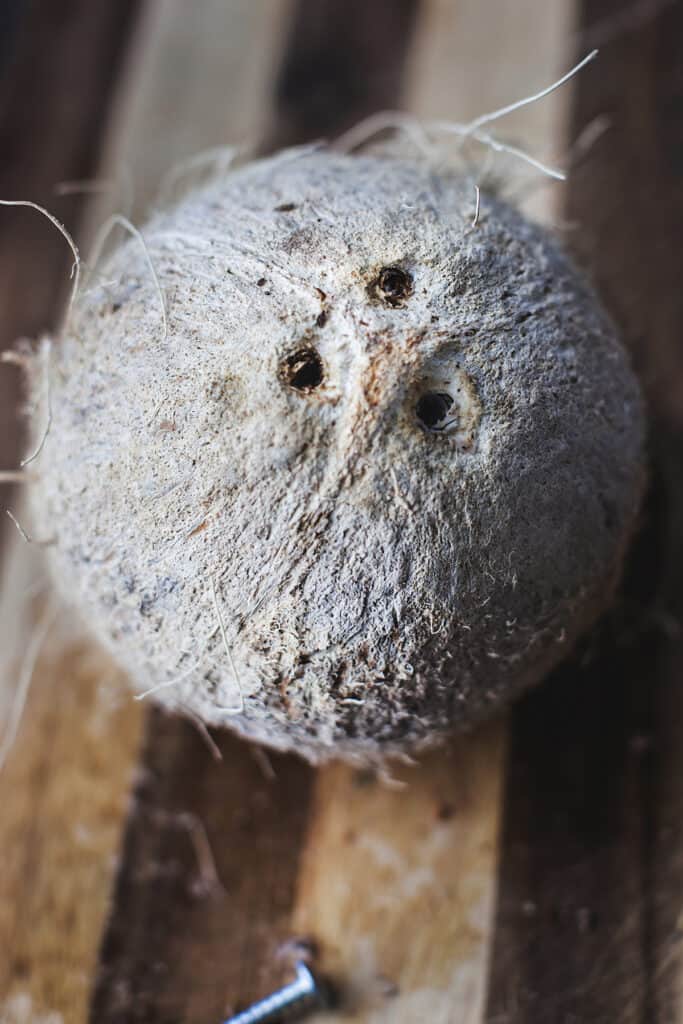
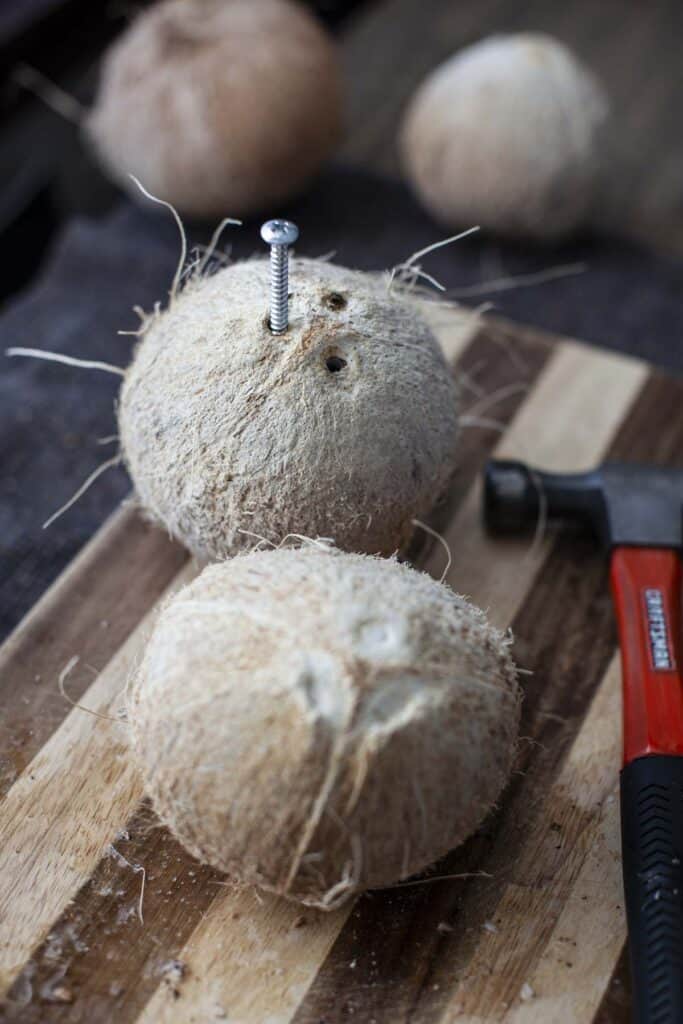
The first eye, the soft eye (or the mouth!), is the easiest to open. The second eye is a bit tougher but can be pried open with force and a tool. The third eye is the hardest and usually not worth the effort.
The key is to drain the coconut water before cracking the shells. Start with the softest eye and firmly poke through using a Phillips head screwdriver, metal straw, or strong chopstick to do this.
Once the liquid is drained, you can crack open the shells and enjoy the delicious coconut meat.
1. A Cleaver Method
The cleaver method is the most dangerous and messy method. Please use extreme caution if you choose this method. Wear thick gloves and goggles to protect your hands and eyes from the knife and the hard shell from bouncing off the cutting board.
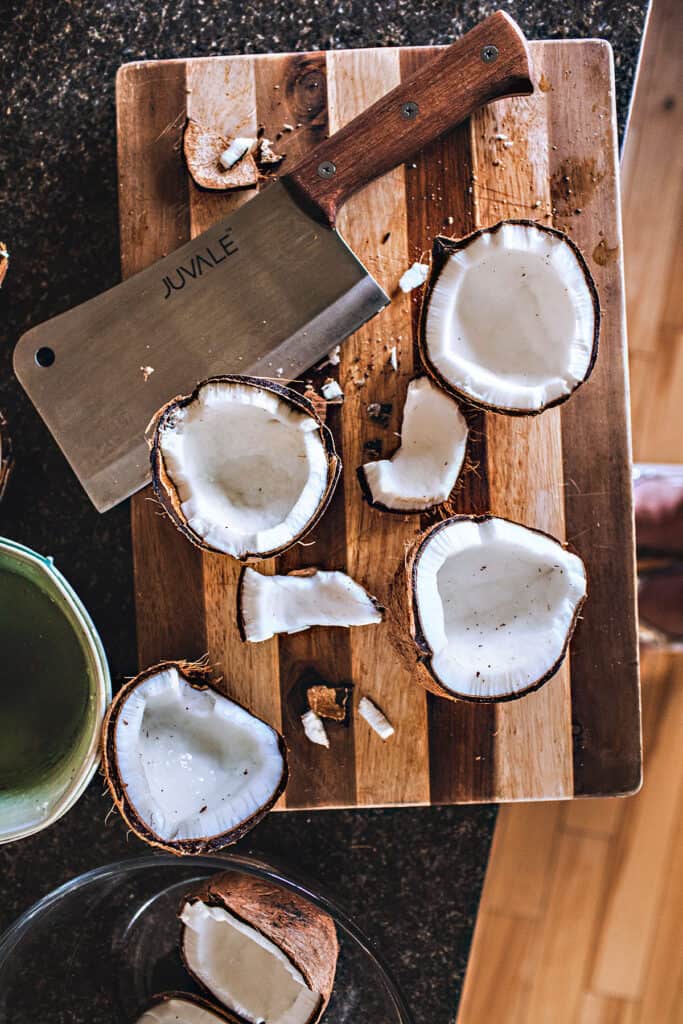
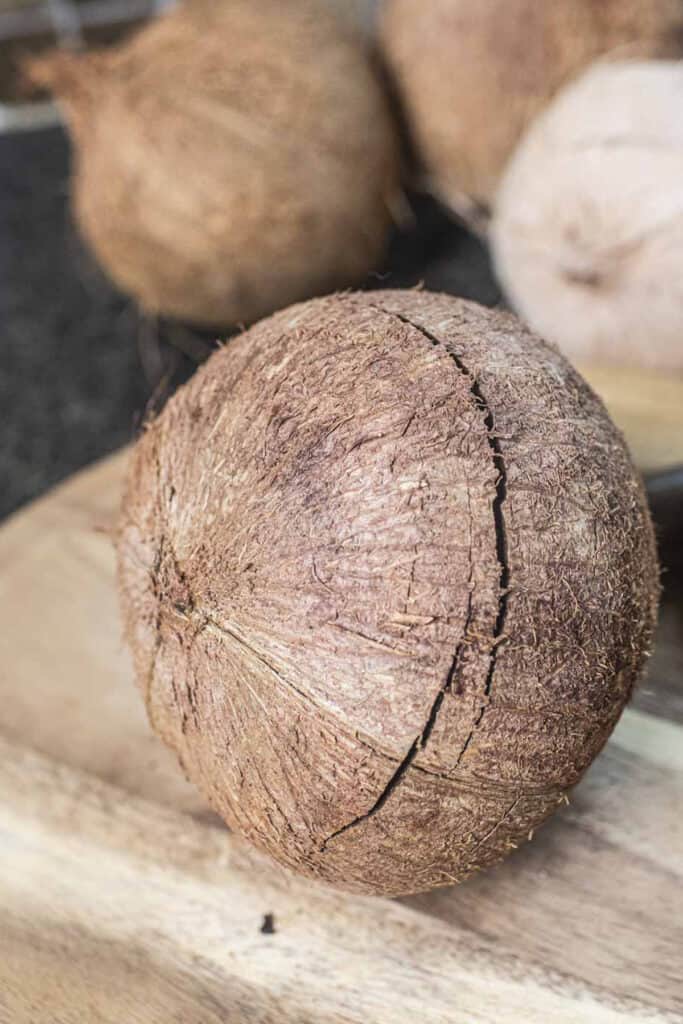
- Tools Needed. Cutting board, cleaver, kitchen towel, screwdriver or chopsticks or metal straws
- Steps
- Poke through one of the eyes of the coconut by finding the softest one out of the three spots. Use a chopstick or a clean screwdriver. (I used my metal drinking straw), wiggle it around to widen the hole a bit. Then, drain the water into a bowl or glass. Feel how much lighter your coconut is!
- Place the coconut on a kitchen towel to prevent slipping.
- Hold the coconut over the towel and strike the middle of the coconut with the cleaver, rotating as you hit. This is the hardest part of opening the coconut. If choosing to use the sharp part of the cleaver, be extremely careful with your hands and fingers. If you are uncomfortable using the sharp edge, use the back of a cleaver instead, like the hammer method. See below.
- Continue until the coconut cracks open. Once there's a crack, pry it with a kitchen knife; it should be easier from here. You'll see the beautiful white coconut flesh.
- Once you have your cracked coconut pieces, use a butter knife or a coconut opener to pry open the meat away from the shell.
- Rinse the flesh of the coconut before use to avoid tough shells or fibers when using or cooking with it.
2. Hammer Method
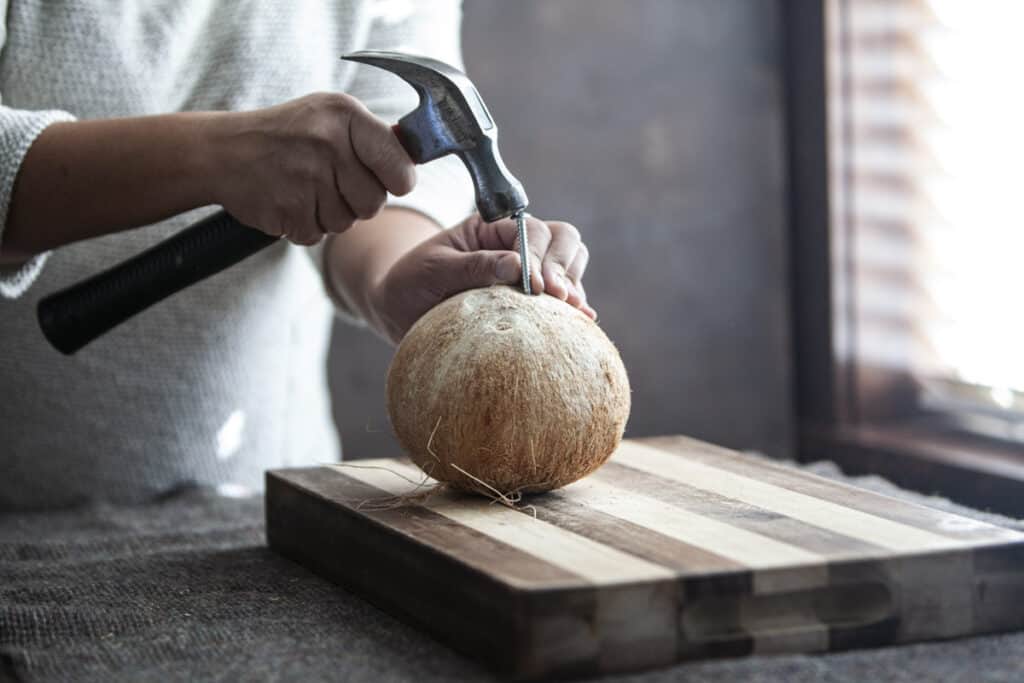
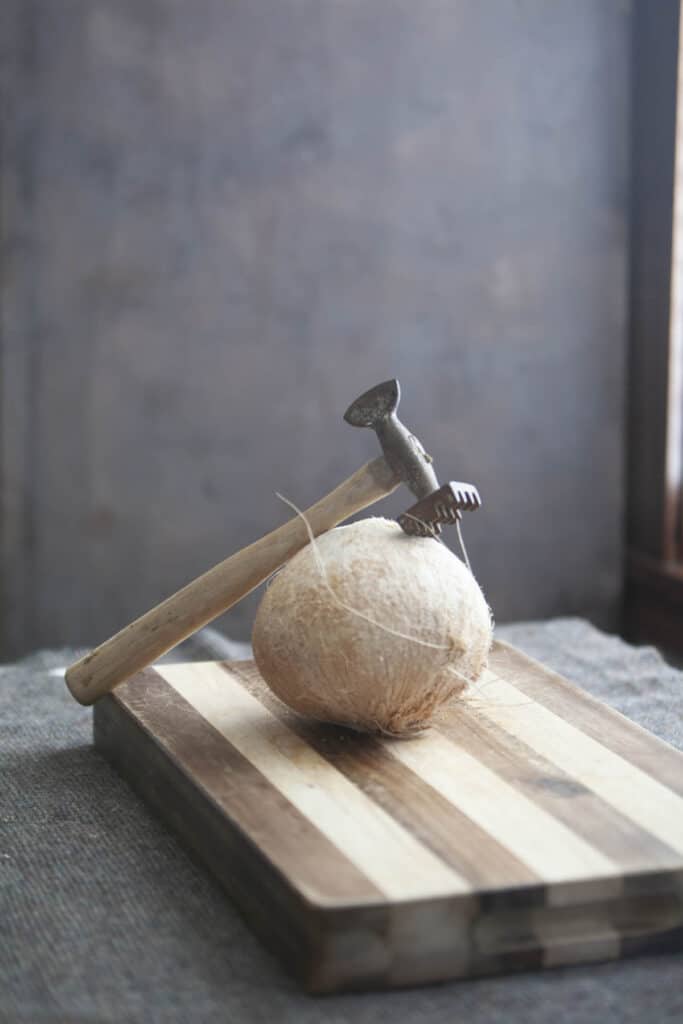
- Tools Needed. Cutting board, hammer, kitchen towel. (I used my vintage hammer (2nd image), and it worked!
- Steps
- Poke a hole through the softness of the coconut. Then, drain the coconut water. You'll have a much lighter coconut now!
- With a firm grip on one hand, carefully strike the side of the coconut with a hammer along its circumference until it cracks. Rotate the coconut and bang away around the circumference of the coconut. Use enough force to make a crack in the outer shell of the coconut.
- Use a kitchen knife or spoon to remove the meat from the shell. Discard the shells.
3. Oven-Baked Method
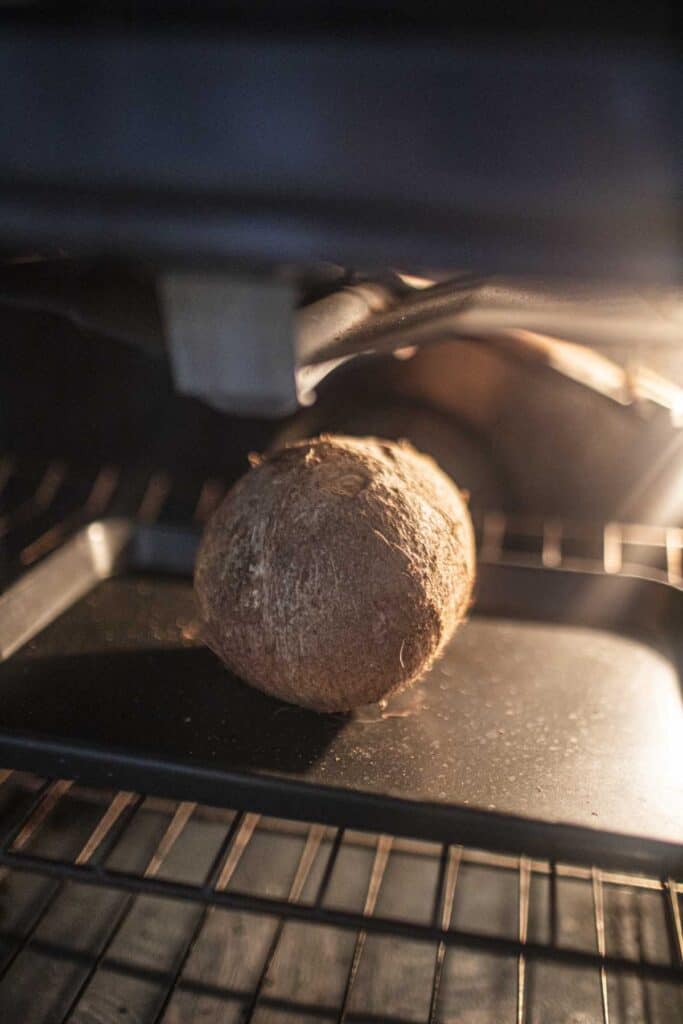
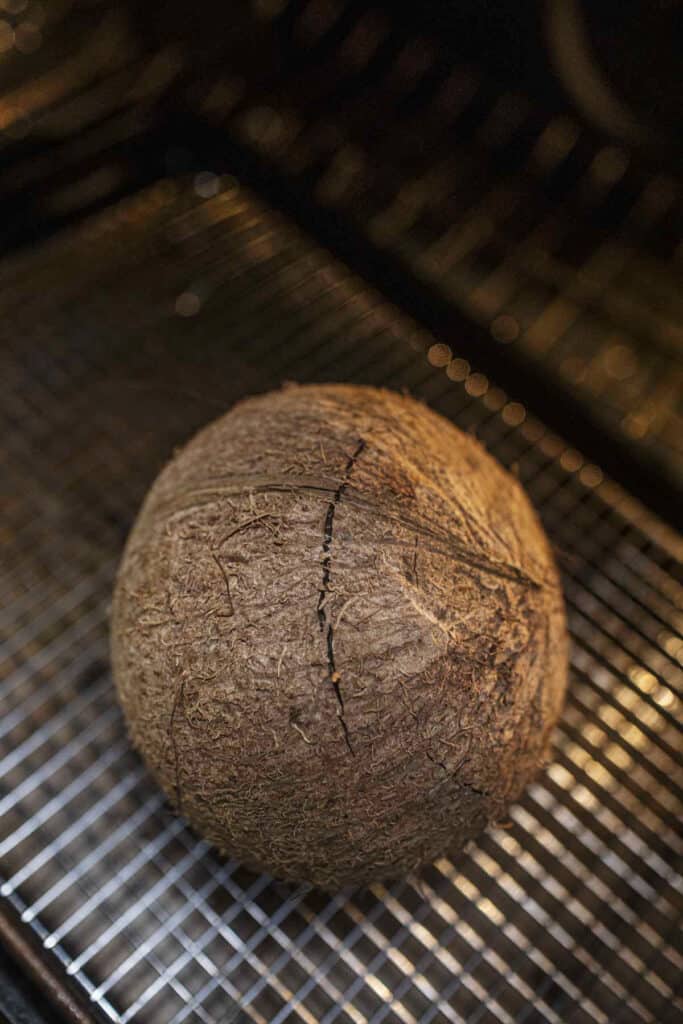
- Tools Needed: Oven, baking sheet.
- Steps
- Preheat the oven to 375°F (190°C). You guessed it, drain the water first before baking it. Use the same poking method as above.
- Place the whole piece of coconut on a baking sheet and bake for about 15 minutes. This method takes very little effort and is highly recommended if it's your first time opening a coconut.
- As soon as you see the cracks on the coconut, remove and cool slightly, then tap with a hammer or similar tool to crack.
- Pry the meat away from the shell.
4. Whacking Method
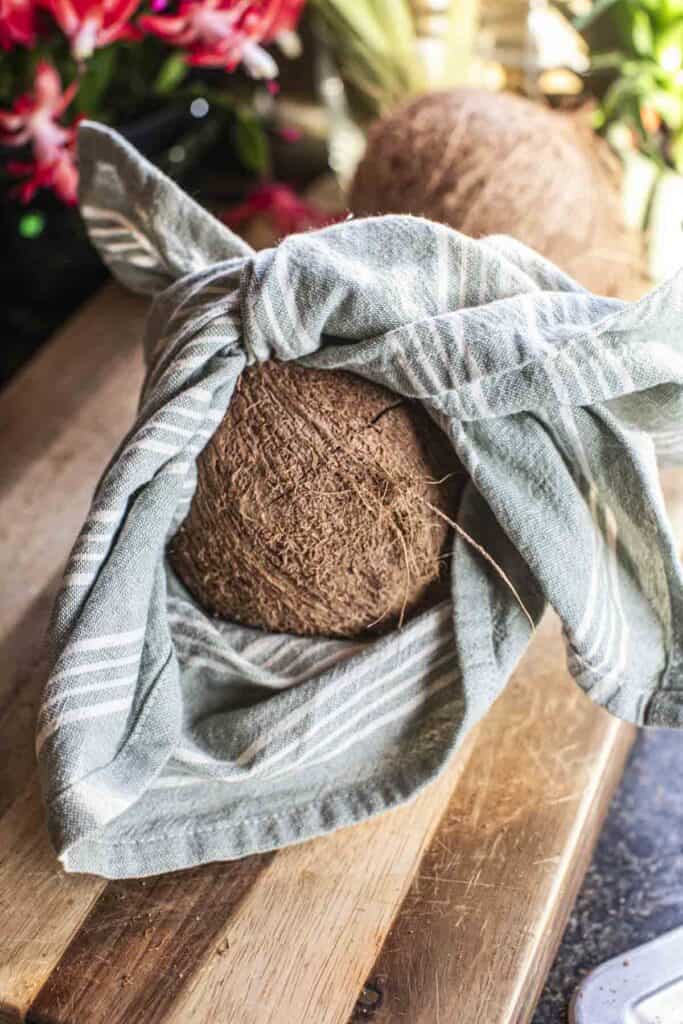
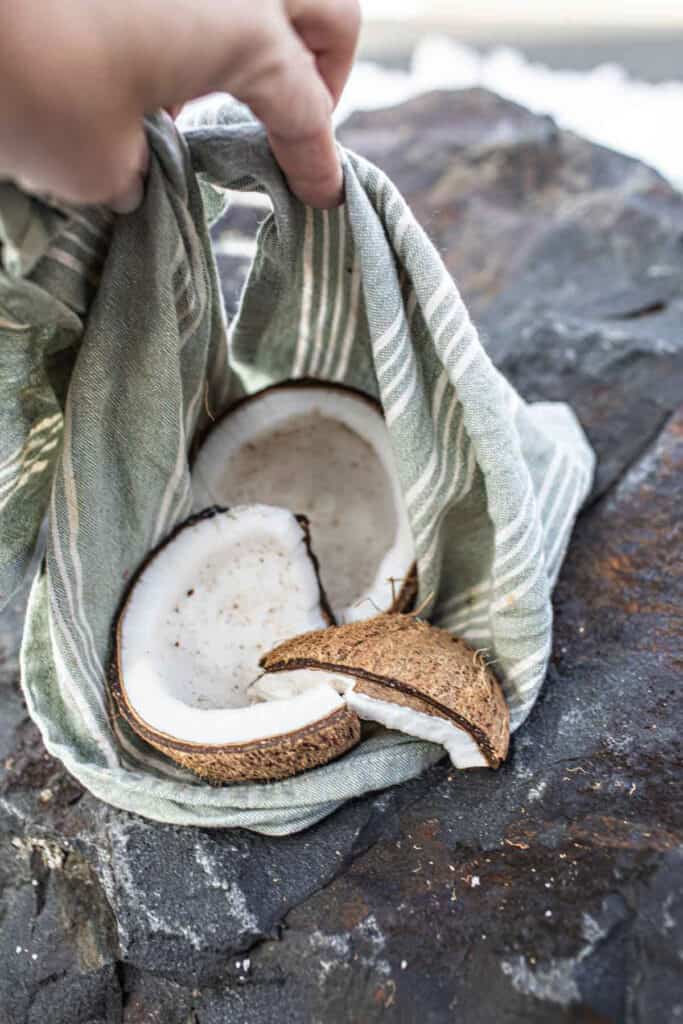
This method is tried and true and will work even if you don't have any tool to open the coconut with. You need a solid wall, rock, or something firm to sling the coconut at. In Thailand, we used the trunk of the coconut for this method. It is the easiest way to open a coconut without any tools around.
- Tools Needed. Cutting board, sturdy knife, a kitchen or tea towel.
- Steps
- Drain the coconut liquid. Then, wrap and tie a kitchen towel around the whole coconut.
- Whack the coconut around a hard surface until a crack forms. I used my landscape rock for this! (; A concrete sidewalk or driveway could work, too!
- Continue until the coconut cracks open.
- Use the knife to remove the meat.
Draining the Coconut
Save the coconut water for refreshing drinks or to use in recipes. Your drained coconut should be much lighter after draining it, making it easier to crack using the abovementioned methods.
What to Do with Coconut Meat
Once you have your hard-earned coconut meat, rinse it well. Here are some ideas on what to use them for!
- Make coconut milk or coconut cream with your grated coconut.
- Enjoy it as a snack.
- Use it in cooking with shredded coconut.
- Freeze them! Shred, grate, or slice the coconut meat into smaller pieces and use them for cooking later. Keep them in airtight containers or plastic bags in the freezer for up to 4 months.
What to do with Coconut Water
Coconut juice or water is a sweet and refreshing liquid inside young and mature coconut. the younger coconut has sweet and satisfying water, while the more mature coconut water is less sweet.
- The water is excellent for hydration. I especially love drinking it after a workout or long runs.
- They are great for making smoothies.
- Excellent for desserts and sweets.
- Freeze them in ice cube trays later with a cup of juice, in a drink, with cocktails, smoothies, or homemade popsicles!
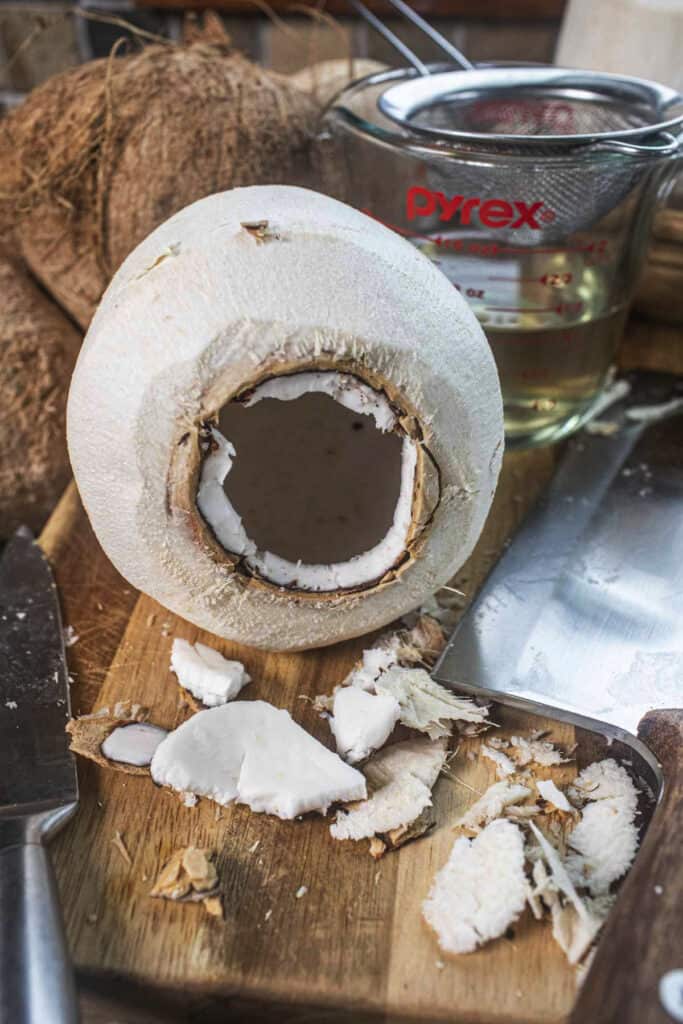
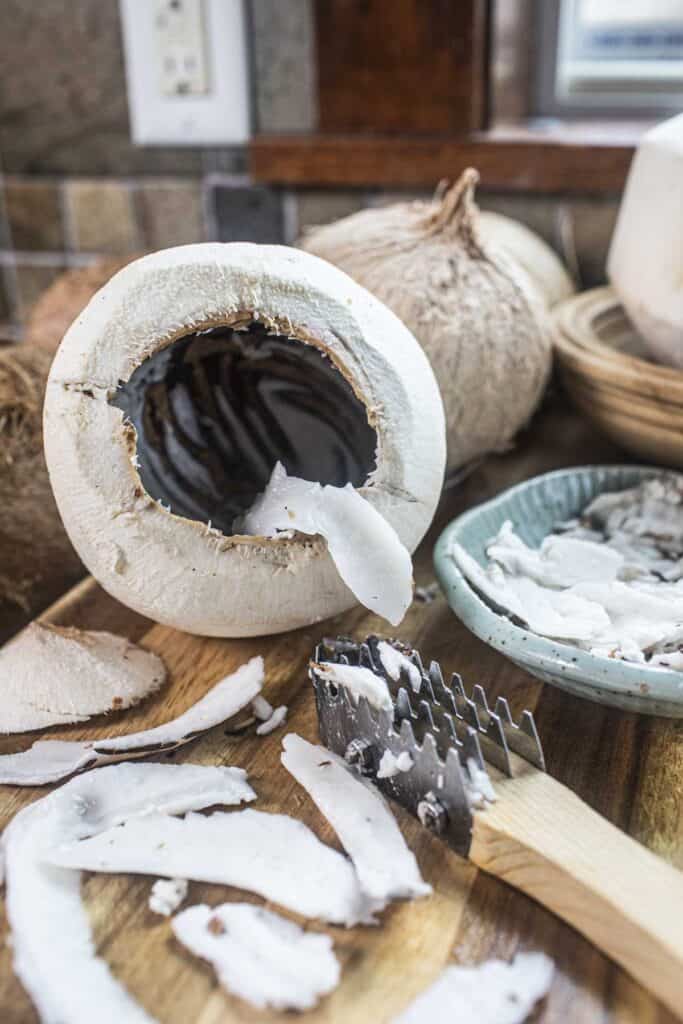
How to Open a Young Coconut
- Tools Needed: sharp knife, straw, spoon, or scraper.
- Steps
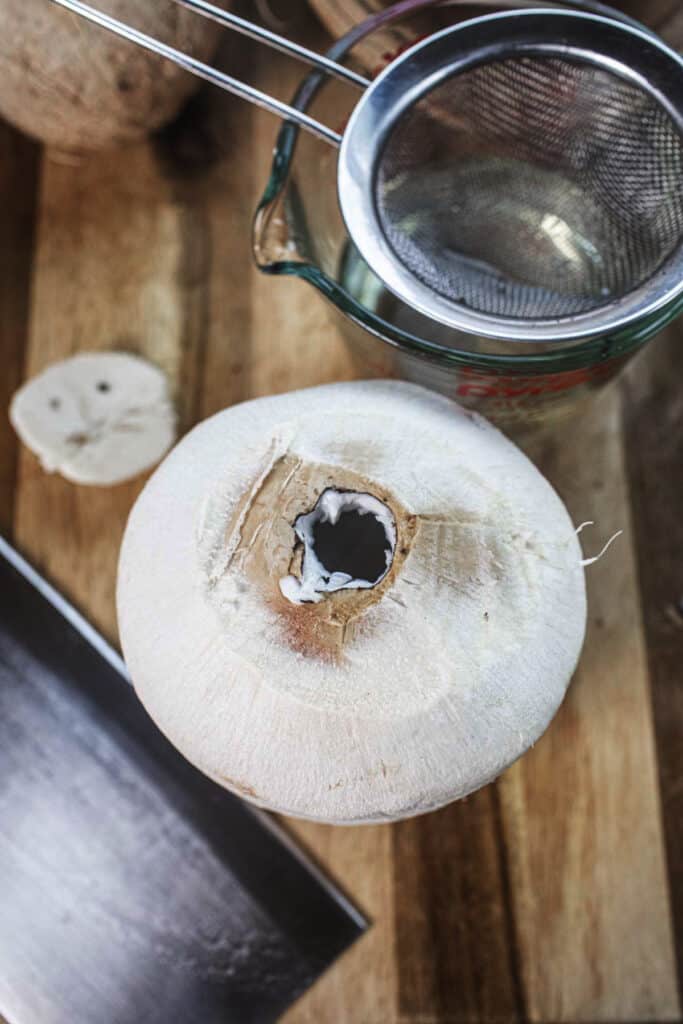
- Cut the top off with a sharp knife.
- Create a hole to drain the water or widen the opening to drink with a straw.
- Use a spoon or a coconut scraper to remove the coconut meat.
What to Do with Young Coconut Meat
- Enjoy it as a snack.
- Use it in cooking in your baking, drinks, desserts
- Use the shredded pieces for cakes, bread, or cookie toppings.
- Shred them into long or small pieces and freeze them for later use.
Thai Recipes Using Coconut
Explore Thai recipes that feature coconut as a key ingredient.
- Shrimp Pad Prik Khing with coconut cream
- Tom Kha Gai
- Creamy Tom Yum soup with coconut milk
- Red curry with kabocha squash
- Pomelo salad
- Massaman curry
Important Tips for Opening a Coconut
- Wearing protective eyewear is always a good idea when cracking a coconut. Flying coconut shells can be dangerous.
- Thick hand gloves can protect your fingers if you're using a sharp knife or hammer method.
- Make cleanup easier by placing a big towel under your cutting board and work surface.
- Keep a bowl or glass nearby to catch the coconut water that leaks quickly once cracked.
- If you don't have a cleaver, try using a heavy kitchen object like a meat tenderizer or pestle. Stone or wood pestles also work. Look in your kitchen for the best tool for cracking your coconut.
- If you crack the coconut cleanly, you can use the coconut halves for serving or decoration after washing them in hot water and drying them.
- Minimize the mess by using a big bowl or plastic bag to scoop up the messy parts of the coconut.
**Love a recipe you've tried? Please leave a 5-star rating in the recipe card below and a review in the comments section further down the page. Or follow me on Facebook, Pinterest, or Instagram!**
Print
How to Open a Coconut
- Total Time: 20
- Yield: 1 1x
- Diet: Gluten Free
Description
Learn how to open a coconut in 4 easy ways! Whether young or mature, without any special tools. Use your everyday items found in your kitchen, and you'll be on your way to enjoying the fragrant water and tasty coconut meat!
Ingredients
- 1 whole coconut, young or old.
Instructions
1. A Clever Method
The clever method is the most dangerous and messy method. Please use extreme caution if you choose this method. Wear thick gloves and goggles to protect your hands and eyes from the knife and the hard shell from bouncing off the cutting board.
Tools Needed: Cutting board, clever, kitchen towel, screwdriver or chopsticks or metal straws
Steps:
- Poke through one of the eyes of the coconut by finding the softest one out of the three spots. Use a chopstick or a clean screwdriver. (I used my metal drinking straw), wiggle it around to widen the hole a bit. Then, drain the water into a bowl or glass. Feel how much lighter your coconut is!
- Place the coconut on a kitchen towel to prevent slipping.
- Hold the coconut over the towel and strike the middle of the coconut with the cleaver, rotating as you hit. This is the hardest part of opening the coconut. If choosing to use the sharp part of the cleaver, be extremely careful with your hands and fingers. If you are uncomfortable using the sharp edge, use the back of a cleaver instead, like the hammer method. See below.
- Continue until the coconut cracks open. Once there's a crack, pry it with a kitchen knife; it should be easier from here. You'll see the beautiful white coconut flesh.
- Once you have your cracked coconut pieces, use a butter knife or a coconut opener to pry open the meat away from the shell.
- Rinse the flesh of the coconut before use to avoid tough shells or fibers when using or cooking with it.
2. Hammer Method
Tools Needed: Cutting board, hammer, kitchen towel. (I used my vintage hammer (2nd image), and it worked!
Steps:
- Poke a hole through the softness of the coconut. Then, drain the coconut water. You'll have a much lighter coconut now.
- With a firm grip on one hand, carefully strike the side of the coconut with a hammer along its circumference until it cracks. Rotate the coconut and bang away around the circumference of the coconut. Use enough force to make a crack in the outer shell of the coconut.
- Use a kitchen knife or spoon to remove the meat from the shell. Discard the shells.
3. Oven-Baked Method
Tools Needed: Oven, baking sheet.
Steps:
- Preheat the oven to 375°F (190°C). You guessed it, drain the water first before baking it. Use the same poking method as above.
- Place the whole piece of coconut on a baking sheet and bake for about 15 minutes. This method takes very little effort and is highly recommended if it's your first time opening a coconut.
- As soon as you see the cracks on the coconut, remove and cool slightly, then tap with a hammer or similar tool to crack.
- Pry the meat away from the shell.
4. Whacking Method
This method is tried and true and will work even if you don't have any tool to open the coconut with. You need a solid wall, rock, or something firm to sling the coconut at. In Thailand, we used the trunk of the coconut for this method. It is the easiest way to open a coconut without any tools around.
Tools Needed: Cutting board, sturdy knife, a kitchen or tea towel.
Steps:
- Drain the coconut liquid. Then, wrap and tie a kitchen towel around the whole coconut.
- Whack the coconut around a hard surface until a crack forms. I used my landscape rock for this! (; A concrete sidewalk or driveway could work, too!
- Continue until the coconut cracks open.
- Use the knife to remove the meat.
How to Open a Young Coconut
Tools Needed: sharp knife, straw, spoon, or scraper.
Steps:
- Cut the top off with a sharp knife.
- Create a hole to drain the water or widen the opening to drink with a straw.
- Use a spoon or a coconut scraper to remove the coconut meat.
Notes
- Wearing protective eyewear is always a good idea when cracking a coconut. Flying coconut shells can be dangerous.
- Thick hand gloves can protect your fingers if you're using a sharp knife or hammer method.
- Make cleanup easier by placing a big towel under your cutting board and work surface.
- Keep a bowl or glass nearby to catch the coconut water that leaks quickly once cracked.
- If you don't have a cleaver, try using a heavy kitchen object like a meat tenderizer or pestle. Stone or wood pestles also work. Look in your kitchen for the best tool for cracking your coconut.
- If you crack the coconut cleanly, you can use the coconut halves for serving or decoration after washing them in hot water and drying them.
- Minimize the mess by using a big bowl or plastic bag to scoop up the messy parts of the coconut.
- Prep Time: 20
- Category: Kitchen Resources
- Method: no cooking
- Cuisine: thai
** Thank you so much for visiting my blog! This is truly a passion for me. If you have enjoyed these recipes and appreciate the hard work I put into them, I would love it if you would share them with your friends! Your recommendation is the highest review I could hope for, and I’d appreciate it! **
More Thai Recipes Using Coconut
Looking for other recipes like this? Try these recipes.
More Thai Kitchen How-To's
Learn these easy kitchen how-to's with these step-by-step photo instructions.





Chae says
Thank you so much for writing detailed instructions! Although we see coconuts in local markets, It has been intimidating to bring them home to prepare them on our own. We look forward to having fresh coconut water and meats!
C says
I love all the different suggestions and options you give for opening the coconut. I also would not have known to drain out the yummy water first before cracking it open.
Cassie says
We just got to buy a fresh coconut and try this! It was such a fun experience for my kids. Thank you for this—who knows what would’ve happened without your help!