Description
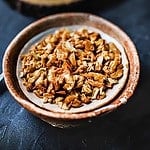
In Thai food, crispy garlic is an ingredient that can take your dishes to the next level. Learn how to make Thai crispy fried garlic and oil (and how to use it). This aromatic and flavorful combination of golden-brown garlic and oil adds a delightful crunch and depth of flavor to various Thai recipes.
Ingredients
Scale
- 2 cups oil (vegetable or grape or canola oil)
- 1 cup garlic, roughly chopped
- A tiny dash of salt (optional)
Instructions
The instructions may seem long, but trust me. It's full of helpful tips to make this recipe successful.
- Heat oil in a small pot or saucepan over medium heat. You'll need enough oil to submerge the garlic cloves completely. Make sure the pot is large enough to hold the oil and garlic. A wok is good for this recipe too. Wait until the oil is hot. Test the oil with a chopstick. The oil should bubble. If so, then add garlic to the pan. Another great way to test the oil is to drop a piece of garlic and see how it responds. If it's ready, the oil will bubble over the pieces. If not, it will float to the surface of the oil. Wait for the bubbles.
- While the oil is heating, peel the garlic cloves and slice them into thin pieces. A sharp knife works best for this task. Tips. Peel and crush the garlic cloves with a heavy knife by pressing down on the knife with the palm of your hand. This technique will help with the ease of peeling your garlic cloves. And this method also helps release oil from the garlic, creating an even more fragrant aroma for your fry garlic. Chop the garlic into small pieces and set aside until the oil is ready. Have a plate lined with paper towels ready too.
- Once the oil is hot, carefully add the sliced garlic to the pot. The hot oil should sizzle gently upon contact with the garlic. Adjust the heat to medium-low if the oil starts to bubble vigorously. Fry the garlic until it's light golden brown. It takes 3-6 minutes, depending on your stovetop and what pans you use. Watch for the light golden brown in the garlic pieces. Stir the garlic around a couple of times with a metal-slotted spoon to ensure the pieces are evenly cooked. The best thing to do is to watch the garlic closely. Once it turns golden brown, you must quickly remove all the fried garlic bits. At this point, the garlic will burn FAST and have a bitter taste to it.
- Once the garlic slices reach a golden color, use the slotted spoon to transfer them to a paper towel-lined plate. Remove the pot from the stove and immediately strain the fried garlic into a paper towel-lined plate with a slotted spoon. The paper towel will absorb any excess oil and help maintain its crispiness. Spread the pieces out thinly on the paper towel. Let cool completely before storing in an airtight or glass container. This is important; your fried garlic will turn soggy if stored while still warm. You can add a dash of salt here, but this is optional.
- Add oil to a medium-sized pot over medium heat. Wait until the oil is hot. Test the oil with a chopstick. The oil should bubble. If so, then add garlic to the pan. Another way to test the oil is to drop a couple of pieces of garlic in the oil and see how it responds. If it's ready, the oil will bubble over the pieces. If not, it will just float in the oil and should wait a bit longer. Fry the garlic until it's light golden brown (anywhere from 4-6 minutes, depending on your stovetop). Stir the garlic around several times to ensure the pieces are evenly cooked. The best thing to do is to watch the garlic closely. Once it turns golden brown, you must move fast as the garlic will burn quickly. Remove the pot from the stove and immediately strain the fresh garlic into a plate lined with a paper towel. Spread the pieces out thinly on the paper towel. Let cool completely before storing in an airtight or glass container. This is important; your fried garlic will turn soggy if stored while still warm. You can add a dash of salt here, but this is optional.
- For the oil, wait until it's cooled before storing it in a glass container. Store the oil separately and keep both at room temperature for up to 2 weeks. You now have a garlic-defused oil that you can use for cooking. It adds an amazing aroma to any dish you cook with.
Notes
- Be sure to use cooking oil with a high smoking point, which can handle high heat without changing its properties while cooking. I suggest using vegetables, grape seed, avocado, corn, or canola oil. Olive oil is not recommended.
- Be mindful of the heat while frying the garlic. Medium heat is recommended, but adjust it to maintain a gentle sizzle without burning the garlic.
- Use a slotted spoon to stir the garlic slices during frying to ensure even browning and prevent them from sticking together.
- Strain the garlic-infused oil through a fine-mesh sieve to remove any small garlic bits before using or storing it.
- The crispy fried garlic can be stored in an airtight container at room temperature for several weeks.
** Thank you so much for visiting my blog! This is truly a passion for me. If you have enjoyed these recipes and appreciate the hard work I put into them, I would love it if you would share them with your friends! Your recommendation is the highest review I could hope for, and I’d appreciate it! **
- Prep Time: 15
- Cook Time: 5
- Category: easy recipes, Recipes
- Method: deep frying
- Cuisine: Thai